27 KiB
It is a fine tuning that corresponds to NovelAI's proposed learning method, automatic captioning, tagging, Windows + VRAM 12GB (for v1.4/1.5) environment, etc.
overview
Fine tuning of U-Net of Stable Diffusion using Diffusers. It corresponds to the following improvements in NovelAI's article (For Aspect Ratio Bucketing, I referred to NovelAI's code, but the final code is all original).
- Use the output of the penultimate layer instead of the last layer of CLIP (Text Encoder).
- Learning at non-square resolutions (Aspect Ratio Bucketing).
- Extend token length from 75 to 225.
- Captioning with BLIP (automatic creation of captions), automatic tagging with DeepDanbooru or WD14Tagger.
- Also supports Hypernetwork learning.
- Supports Stable Diffusion v2.0 (base and 768/v).
- By acquiring the output of VAE in advance and saving it to disk, we aim to save memory and speed up learning.
Text Encoder is not trained by default. For fine tuning of the whole model, it seems common to learn only U-Net (NovelAI seems to be the same). Text Encoder can also be learned as an option.
Additional features
Change CLIP output
CLIP (Text Encoder) converts the text into features in order to reflect the prompt in the image. Stable diffusion uses the output of the last layer of CLIP, but you can change it to use the output of the penultimate layer. According to NovelAI, this will reflect prompts more accurately. It is also possible to use the output of the last layer as is. *Stable Diffusion 2.0 uses the penultimate layer by default. Do not specify the clip_skip option.
Training in non-square resolutions
Stable Diffusion is trained at 512*512, but also at resolutions such as 256*1024 and 384*640. It is expected that this will reduce the cropped portion and learn the relationship between prompts and images more correctly. The learning resolution is adjusted vertically and horizontally in units of 64 pixels within a range that does not exceed the resolution area (= memory usage) given as a parameter.
In machine learning, it is common to unify all input sizes, but there are no particular restrictions, and in fact it is okay as long as they are unified within the same batch. NovelAI's bucketing seems to refer to classifying training data in advance for each learning resolution according to the aspect ratio. And by creating a batch with the images in each bucket, the image size of the batch is unified.
Extending token length from 75 to 225
Stable diffusion has a maximum of 75 tokens (77 tokens including the start and end), but we will extend it to 225 tokens. However, the maximum length that CLIP accepts is 75 tokens, so in the case of 225 tokens, we simply divide it into thirds, call CLIP, and then concatenate the results.
*I'm not sure if this is the preferred implementation. It seems to be working for now. Especially in 2.0, there is no implementation that can be used as a reference, so I have implemented it independently.
*Automatic1111's Web UI seems to divide the text with commas in mind, but in my case, it's a simple division.
Environmental arrangement
See the README in this repository.
Preparing teacher data
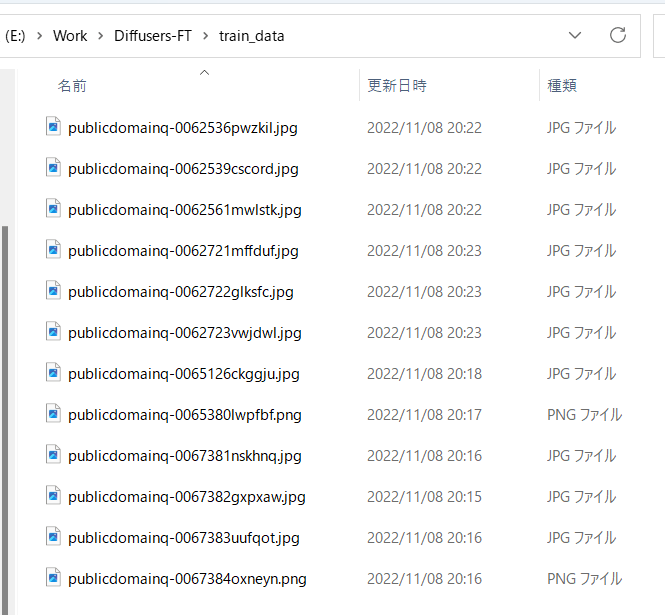
Prepare the image data you want to learn and put it in any folder. No prior preparation such as resizing is required. However, for images that are smaller than the training resolution, it is recommended to enlarge them while maintaining the quality using super-resolution.
It also supports multiple teacher data folders. Preprocessing will be executed for each folder.
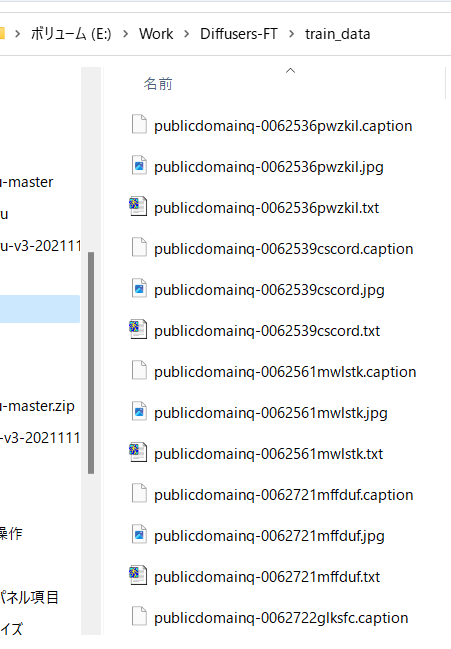
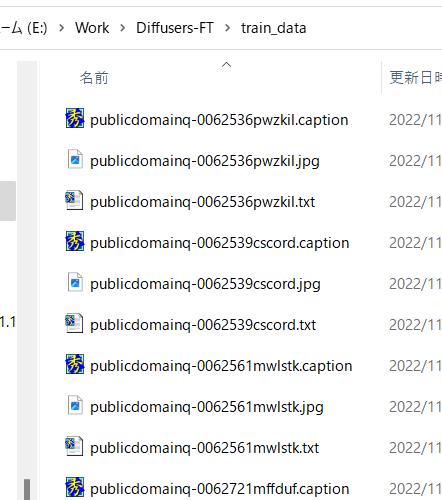
For example, store an image like this:
Automatic captioning
Skip if you just want to learn tags without captions.
Also, when preparing captions manually, prepare them in the same directory as the teacher data image, with the same file name, extension .caption, etc. Each file should be a text file with only one line.
Captioning with BLIP
The latest version no longer requires BLIP downloads, weight downloads, and additional virtual environments. Works as-is.
Run make_captions.py in the finetune folder.
python finetune\make_captions.py --batch_size <batch size> <teacher data folder>
If the batch size is 8 and the training data is placed in the parent folder train_data, it will be as follows.
python finetune\make_captions.py --batch_size 8 ..\train_data
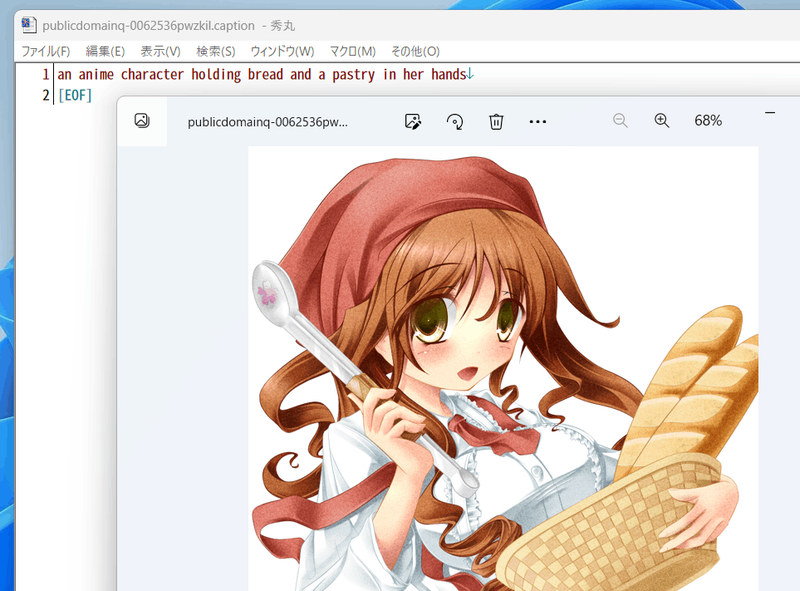
A caption file is created in the same directory as the teacher data image with the same file name and extension .caption.
Increase or decrease batch_size according to the VRAM capacity of the GPU. Bigger is faster (I think 12GB of VRAM can be a little more). You can specify the maximum length of the caption with the max_length option. Default is 75. It may be longer if the model is trained with a token length of 225. You can change the caption extension with the caption_extension option. Default is .caption (.txt conflicts with DeepDanbooru described later).
If there are multiple teacher data folders, execute for each folder.
Note that the inference is random, so the results will change each time you run it. If you want to fix it, specify a random number seed like "--seed 42" with the --seed option.
For other options, please refer to the help with --help (there seems to be no documentation for the meaning of the parameters, so you have to look at the source).
A caption file is generated with the extension .caption by default.
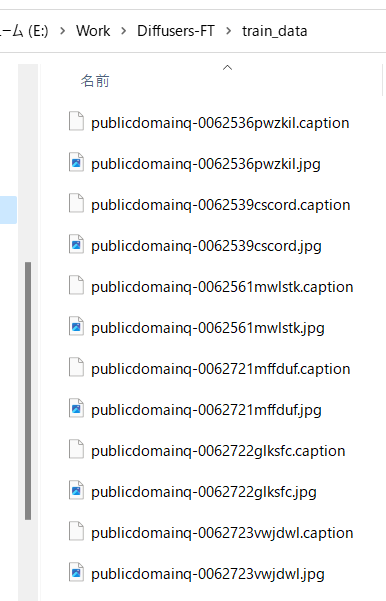
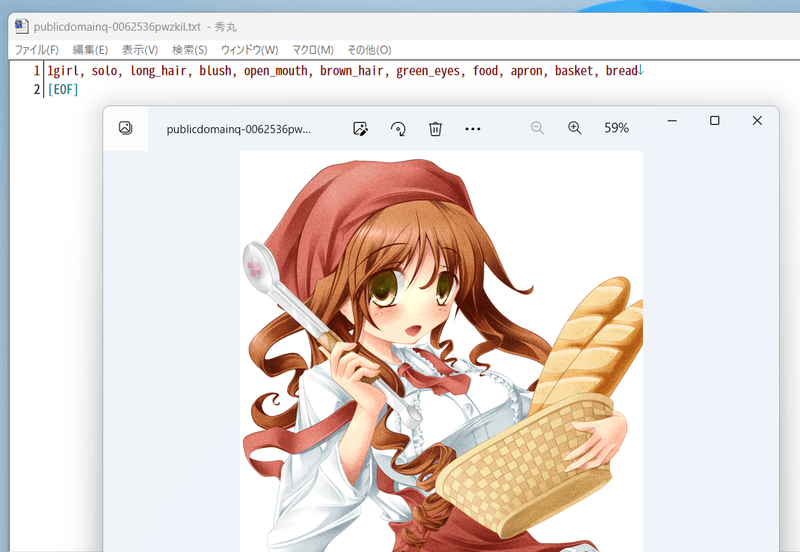
For example, with captions like:
Tagged by DeepDanbooru
If you do not want to tag the danbooru tag itself, please proceed to "Preprocessing of caption and tag information".
Tagging is done with DeepDanbooru or WD14Tagger. WD14Tagger seems to be more accurate. If you want to tag with WD14Tagger, skip to the next chapter.
Environmental arrangement
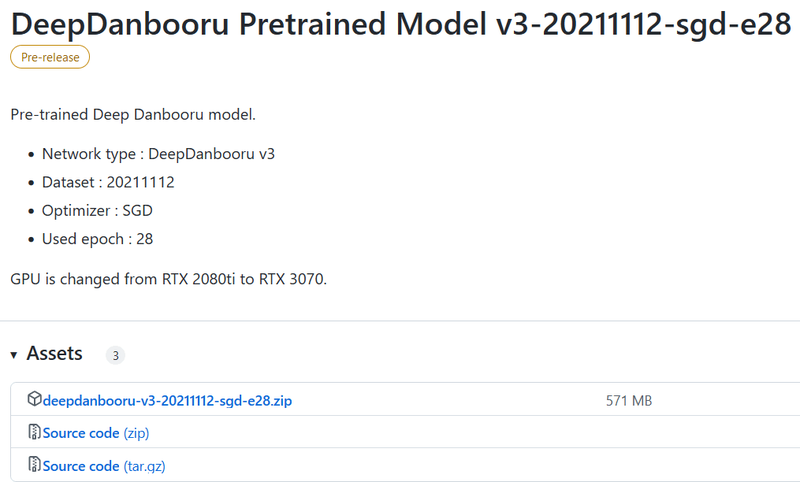
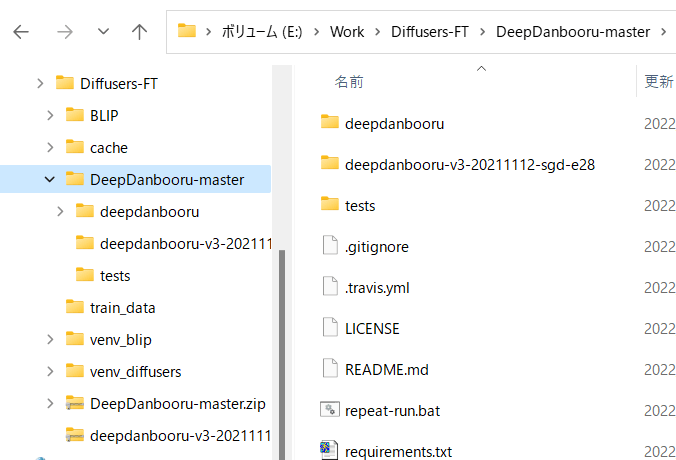
Clone DeepDanbooru https://github.com/KichangKim/DeepDanbooru into your working folder, or download the zip and extract it. I unzipped it. Also, download deepdanbooru-v3-20211112-sgd-e28.zip from Assets of "DeepDanbooru Pretrained Model v3-20211112-sgd-e28" on the DeepDanbooru Releases page https://github.com/KichangKim/DeepDanbooru/releases and extract it to the DeepDanbooru folder.
Download from below. Click to open Assets and download from there.
Make a directory structure like this
Install the necessary libraries for the Diffusers environment. Go to the DeepDanbooru folder and install it (I think it's actually just adding tensorflow-io).
pip install -r requirements.txt
Next, install DeepDanbooru itself.
pip install .
This completes the preparation of the environment for tagging.
Implementing tagging
Go to DeepDanbooru's folder and run deepdanbooru to tag.
deepdanbooru evaluate <teacher data folder> --project-path deepdanbooru-v3-20211112-sgd-e28 --allow-folder --save-txt
If you put the training data in the parent folder train_data, it will be as follows.
deepdanbooru evaluate ../train_data --project-path deepdanbooru-v3-20211112-sgd-e28 --allow-folder --save-txt
A tag file is created in the same directory as the teacher data image with the same file name and extension .txt. It is slow because it is processed one by one.
If there are multiple teacher data folders, execute for each folder.
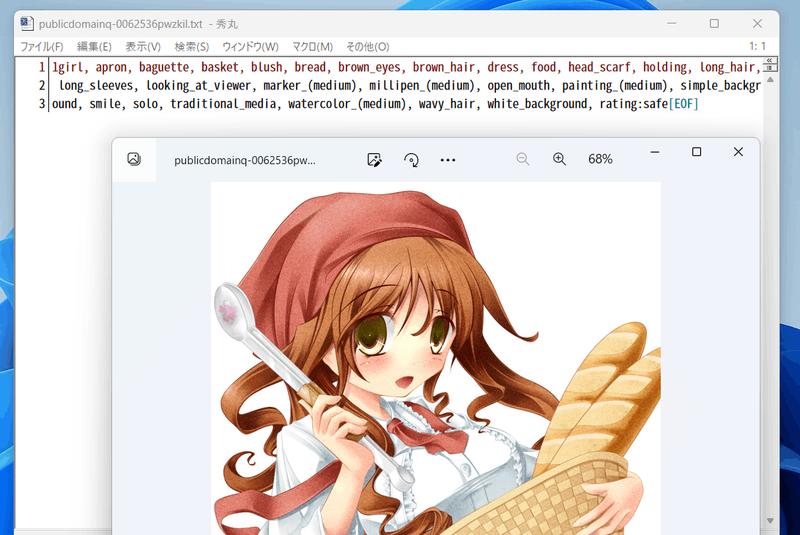
It is generated as follows.
A tag is attached like this (great amount of information...).
Tagging with WD14Tagger
This procedure uses WD14Tagger instead of DeepDanbooru.
Use the tagger used in Mr. Automatic1111's WebUI. I referred to the information on this github page (https://github.com/toriato/stable-diffusion-webui-wd14-tagger#mrsmilingwolfs-model-aka-waifu-diffusion-14-tagger).
The modules required for the initial environment maintenance have already been installed. Weights are automatically downloaded from Hugging Face.
Implementing tagging
Run the script to do the tagging.
python tag_images_by_wd14_tagger.py --batch_size <batch size> <teacher data folder>
If you put the training data in the parent folder train_data, it will be as follows.
python tag_images_by_wd14_tagger.py --batch_size 4 ..\train_data
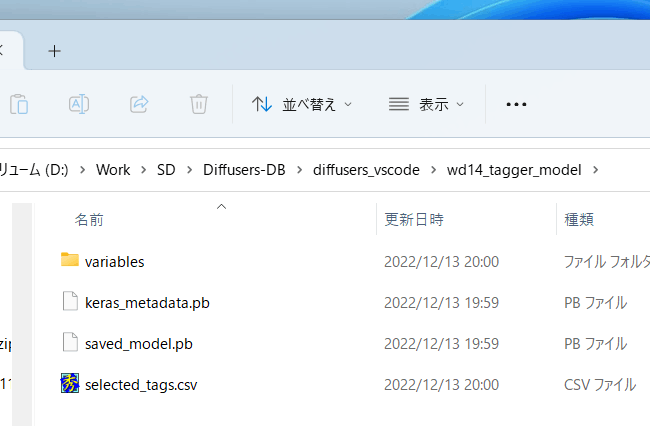
The model file will be automatically downloaded to the wd14_tagger_model folder on first launch (folder can be changed in options). It will be as follows.
A tag file is created in the same directory as the teacher data image with the same file name and extension .txt.
With the thresh option, you can specify the number of confidences of the determined tag to attach the tag. The default is 0.35, same as the WD14Tagger sample. Lower values give more tags, but less accuracy. Increase or decrease batch_size according to the VRAM capacity of the GPU. Bigger is faster (I think 12GB of VRAM can be a little more). You can change the tag file extension with the caption_extension option. Default is .txt. You can specify the folder where the model is saved with the model_dir option. Also, if you specify the force_download option, the model will be re-downloaded even if there is a save destination folder.
If there are multiple teacher data folders, execute for each folder.
Preprocessing caption and tag information
Combine captions and tags into a single file as metadata for easy processing from scripts.
Caption preprocessing
To put captions into the metadata, run the following in your working folder (if you don't use captions for learning, you don't need to run this) (it's actually a single line, and so on).
python merge_captions_to_metadata.py <teacher data folder>
--in_json <metadata file name to read>
     <metadata file name>
The metadata file name is an arbitrary name. If the training data is train_data, there is no metadata file to read, and the metadata file is meta_cap.json, it will be as follows.
python merge_captions_to_metadata.py train_data meta_cap.json
You can specify the caption extension with the caption_extension option.
If there are multiple teacher data folders, please specify the full_path argument (metadata will have full path information). Then run it for each folder.
python merge_captions_to_metadata.py --full_path
     train_data1 meta_cap1.json
python merge_captions_to_metadata.py --full_path --in_json meta_cap1.json
     train_data2 meta_cap2.json
If in_json is omitted, if there is a write destination metadata file, it will be read from there and overwritten there.
__*It is safe to rewrite the in_json option and the write destination each time and write to a separate metadata file. __
Tag preprocessing
Similarly, tags are also collected in metadata (no need to do this if tags are not used for learning).
python merge_dd_tags_to_metadata.py <teacher data folder>
     --in_json <metadata file name to load>
     <metadata file name to write>
With the same directory structure as above, when reading meta_cap.json and writing to meta_cap_dd.json, it will be as follows.
python merge_dd_tags_to_metadata.py train_data --in_json meta_cap.json meta_cap_dd.json
If you have multiple teacher data folders, please specify the full_path argument. Then run it for each folder.
python merge_dd_tags_to_metadata.py --full_path --in_json meta_cap2.json
     train_data1 meta_cap_dd1.json
python merge_dd_tags_to_metadata.py --full_path --in_json meta_cap_dd1.json
     train_data2 meta_cap_dd2.json
If in_json is omitted, if there is a write destination metadata file, it will be read from there and overwritten there.
__*It is safe to rewrite the in_json option and the write destination each time and write to a separate metadata file. __
Cleaning captions and tags
Up to this point, captions and DeepDanbooru tags have been put together in the metadata file. However, captions with automatic captioning are subtle due to spelling variations (*), and tags include underscores and ratings (in the case of DeepDanbooru), so the editor's replacement function etc. You should use it to clean your captions and tags.
*For example, when learning a girl in an anime picture, there are variations in captions such as girl/girls/woman/women. Also, it may be more appropriate to simply use "girl" for things like "anime girl".
A script for cleaning is provided, so please edit the contents of the script according to the situation and use it.
(It is no longer necessary to specify the teacher data folder. All data in the metadata will be cleaned.)
python clean_captions_and_tags.py <metadata file name to read> <metadata file name to write>
Please note that --in_json is not included. For example:
python clean_captions_and_tags.py meta_cap_dd.json meta_clean.json
Preprocessing of captions and tags is now complete.
Get latents in advance
In order to speed up the learning, we acquire the latent representation of the image in advance and save it to disk. At the same time, bucketing (classifying the training data according to the aspect ratio) is performed.
In your working folder, type:
python prepare_buckets_latents.py <teacher data folder>
     <metadata file name to read> <metadata file name to write>
     <model name or checkpoint for fine tuning>
     --batch_size <batch size>
     --max_resolution <resolution width, height>
     --mixed_precision <precision>
If the model is model.ckpt, batch size 4, training resolution is 512*512, precision is no (float32), read metadata from meta_clean.json and write to meta_lat.json:
python prepare_buckets_latents.py
     train_data meta_clean.json meta_lat.json model.ckpt
     --batch_size 4 --max_resolution 512,512 --mixed_precision no
Latents are saved in numpy npz format in the teacher data folder.
Specify the --v2 option when loading a Stable Diffusion 2.0 model (--v_parameterization is not required).
You can specify the minimum resolution size with the --min_bucket_reso option and the maximum size with the --max_bucket_reso option. The defaults are 256 and 1024 respectively. For example, specifying a minimum size of 384 will not use resolutions such as 256*1024 or 320*768. If you increase the resolution to something like 768*768, you should specify something like 1280 for the maximum size.
If you specify the --flip_aug option, it will perform horizontal flip augmentation (data augmentation). You can artificially double the amount of data, but if you specify it when the data is not left-right symmetrical (for example, character appearance, hairstyle, etc.), learning will not go well. (This is a simple implementation that acquires the latents for the flipped image and saves the *_flip.npz file. No options are required for fline_tune.py. If there is a file with _flip, Randomly load a file without
The batch size may be increased a little more even with 12GB of VRAM. The resolution is a number divisible by 64, and is specified by "width, height". The resolution is directly linked to the memory size during fine tuning. 512,512 seems to be the limit with VRAM 12GB (*). 16GB may be raised to 512,704 or 512,768. Even with 256, 256, etc., it seems to be difficult with 8GB of VRAM (because parameters and optimizers require a certain amount of memory regardless of resolution).
*There was also a report that learning batch size 1 worked with 12GB VRAM and 640,640.
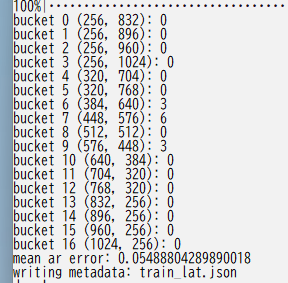
The result of bucketing is displayed as follows.
If you have multiple teacher data folders, please specify the full_path argument. Then run it for each folder.
python prepare_buckets_latents.py --full_path
     train_data1 meta_clean.json meta_lat1.json model.ckpt
     --batch_size 4 --max_resolution 512,512 --mixed_precision no

python prepare_buckets_latents.py --full_path
     train_data2 meta_lat1.json meta_lat2.json model.ckpt
     --batch_size 4 --max_resolution 512,512 --mixed_precision no
It is possible to make the read source and write destination the same, but separate is safer.
__*It is safe to rewrite the argument each time and write it to a separate metadata file. __
Run training
For example: Below are the settings for saving memory.
accelerate launch --num_cpu_threads_per_process 8 fine_tune.py
     --pretrained_model_name_or_path=model.ckpt
     --in_json meta_lat.json
     --train_data_dir=train_data
     --output_dir=fine_tuned
     --shuffle_caption
     --train_batch_size=1 --learning_rate=5e-6 --max_train_steps=10000
     --use_8bit_adam --xformers --gradient_checkpointing
     --mixed_precision=bf16
     --save_every_n_epochs=4
It seems to be good to specify the number of CPU cores for num_cpu_threads_per_process of accelerate.
Specify the model to be trained in pretrained_model_name_or_path (Stable Diffusion checkpoint or Diffusers model). Stable Diffusion checkpoint supports .ckpt and .safetensors (automatically determined by extension).
Specifies the metadata file when caching latent to in_json.
Specify the training data folder for train_data_dir and the output destination folder for the trained model for output_dir.
If shuffle_caption is specified, captions and tags are shuffled and learned in units separated by commas (this is the method used in Waifu Diffusion v1.3). (You can keep some of the leading tokens fixed without shuffling. See keep_tokens for other options.)
Specify the batch size in train_batch_size. Specify 1 or 2 for VRAM 12GB. The number that can be specified also changes depending on the resolution. The actual amount of data used for training is "batch size x number of steps". When increasing the batch size, the number of steps can be decreased accordingly.
Specify the learning rate in learning_rate. For example Waifu Diffusion v1.3 seems to be 5e-6. Specify the number of steps in max_train_steps.
Specify use_8bit_adam to use the 8-bit Adam Optimizer. It saves memory and speeds up, but accuracy may decrease.
Specifying xformers replaces CrossAttention to save memory and speed up.
- As of 11/9, xformers will cause an error in float32 learning, so please use bf16/fp16 or use memory-saving CrossAttention with mem_eff_attn instead (speed is inferior to xformers).
Enable intermediate saving of gradients in gradient_checkpointing. It's slower, but uses less memory.
Specifies whether to use mixed precision with mixed_precision. Specifying "fp16" or "bf16" saves memory, but accuracy is inferior. "fp16" and "bf16" use almost the same amount of memory, and it is said that bf16 has better learning results (I didn't feel much difference in the range I tried). If "no" is specified, it will not be used (it will be float32).
- It seems that an error will occur when reading checkpoints learned with bf16 with Mr. AUTOMATIC1111's Web UI. This seems to be because the data type bfloat16 causes an error in the Web UI model safety checker. Save in fp16 or float32 format with the save_precision option. Or it seems to be good to store it in safetytensors format.
Specifying save_every_n_epochs will save the model being trained every time that many epochs have passed.
Supports Stable Diffusion 2.0
Specify the --v2 option when using Hugging Face's stable-diffusion-2-base, and specify both --v2 and --v_parameterization options when using stable-diffusion-2 or 768-v-ema.ckpt please.
Increase accuracy and speed when memory is available
First, removing gradient_checkpointing will speed it up. However, the batch size that can be set is reduced, so please set while looking at the balance between accuracy and speed.
Increasing the batch size increases speed and accuracy. Increase the speed while checking the speed per data within the range where the memory is sufficient (the speed may actually decrease when the memory is at the limit).
Change CLIP output used
Specifying 2 for the clip_skip option uses the output of the next-to-last layer. If 1 or option is omitted, the last layer is used. The learned model should be able to be inferred by Automatic1111's web UI.
*SD2.0 uses the second layer from the back by default, so please do not specify it when learning SD2.0.
If the model being trained was originally trained to use the second layer, 2 is a good value.
If you were using the last layer instead, the entire model would have been trained on that assumption. Therefore, if you train again using the second layer, you may need a certain number of teacher data and longer learning to obtain the desired learning result.
Extending Token Length
You can learn by extending the token length by specifying 150 or 225 for max_token_length. The learned model should be able to be inferred by Automatic1111's web UI.
As with clip_skip, learning with a length different from the learning state of the model may require a certain amount of teacher data and a longer learning time.
Save learning log
Specify the log save destination folder in the logging_dir option. Logs in TensorBoard format are saved.
For example, if you specify --logging_dir=logs, a logs folder will be created in your working folder, and logs will be saved in the date/time folder. Also, if you specify the --log_prefix option, the specified string will be added before the date and time. Use "--logging_dir=logs --log_prefix=fine_tune_style1" for identification.
To check the log with TensorBoard, open another command prompt and enter the following in the working folder (I think tensorboard is installed when Diffusers is installed, but if it is not installed, pip install Please put it in tensorboard).
tensorboard --logdir=logs
Learning Hypernetworks
It will be explained in another article.
Learning with fp16 gradient (experimental feature)
The full_fp16 option will change the gradient from normal float32 to float16 (fp16) and learn (it seems to be full fp16 learning instead of mixed precision). As a result, it seems that the SD1.x 512512 size can be learned with a VRAM usage of less than 8GB, and the SD2.x 512512 size can be learned with a VRAM usage of less than 12GB.
Specify fp16 in advance in accelerate config and optionally set mixed_precision="fp16" (does not work with bf16).
To minimize memory usage, use the xformers, use_8bit_adam, gradient_checkpointing options and set train_batch_size to 1. (If you can afford it, increasing the train_batch_size step by step should improve the accuracy a little.)
It is realized by patching the PyTorch source (confirmed with PyTorch 1.12.1 and 1.13.0). The accuracy will drop considerably, and the probability of learning failure on the way will also increase. The setting of the learning rate and the number of steps seems to be severe. Please be aware of them and use them at your own risk.
Other Options
keep_tokens
If a number is specified, the specified number of tokens (comma-separated strings) from the beginning of the caption are fixed without being shuffled.
If there are both captions and tags, the prompts during learning will be concatenated like "caption, tag 1, tag 2...", so if you set "--keep_tokens=1", the caption will always be at the beginning during learning. will come.
dataset_repeats
If the number of data sets is extremely small, the epoch will end soon (it will take some time at the epoch break), so please specify a numerical value and multiply the data by some to make the epoch longer.
train_text_encoder
Text Encoder is also a learning target. Slightly increased memory usage.
In normal fine tuning, the Text Encoder is not targeted for training (probably because U-Net is trained to follow the output of the Text Encoder), but if the number of training data is small, the Text Encoder is trained like DreamBooth. also seems to be valid.
save_precision
The data format when saving checkpoints can be specified from float, fp16, and bf16 (if not specified, it is the same as the data format during learning). It saves disk space, but the model produces different results. Also, if you specify float or fp16, you should be able to read it on Mr. 1111's Web UI.
*For VAE, the data format of the original checkpoint will remain, so the model size may not be reduced to a little over 2GB even with fp16.
save_model_as
Specify the save format of the model. Specify one of ckpt, safetensors, diffusers, diffusers_safetensors.
When reading Stable Diffusion format (ckpt or safetensors) and saving in Diffusers format, missing information is supplemented by dropping v1.5 or v2.1 information from Hugging Face.
use_safetensors
This option saves checkpoints in safetyensors format. The save format will be the default (same format as loaded).
save_state and resume
The save_state option saves the learning state of the optimizer, etc. in addition to the checkpoint in the folder when saving midway and at the final save. This avoids a decrease in accuracy when learning is resumed after being interrupted (since the optimizer optimizes while having a state, if the state is reset, the optimization must be performed again from the initial state. not). Note that the number of steps is not saved due to Accelerate specifications.
When starting the script, you can resume by specifying the folder where the state is saved with the resume option.
Please note that the learning state will be about 5 GB per save, so please be careful of the disk capacity.
gradient_accumulation_steps
Updates the gradient in batches for the specified number of steps. Has a similar effect to increasing the batch size, but consumes slightly more memory.
*The Accelerate specification does not support multiple learning models, so if you set Text Encoder as the learning target and specify a value of 2 or more for this option, an error may occur.
lr_scheduler / lr_warmup_steps
You can choose the learning rate scheduler from linear, cosine, cosine_with_restarts, polynomial, constant, constant_with_warmup with the lr_scheduler option. Default is constant.
With lr_warmup_steps, you can specify the number of steps to warm up the scheduler (gradually changing the learning rate). Please do your own research for details.
diffusers_xformers
Uses Diffusers' xformers feature rather than the script's own xformers replacement feature. Hypernetwork learning is no longer possible.