18 KiB
A guide to DreamBooth. The same procedure is used for training additional networks such as LoRA.
overview
The main functions of the script are as follows.
- Memory saving by 8bit Adam optimizer and latent cache (similar to ShivamShirao's version).
- Saved memory by xformers.
- Study in any size, not just 512x512.
- Quality improvement with augmentation.
- Supports fine tuning of Text Encoder+U-Net as well as DreamBooth.
- Read and write models in StableDiffusion format.
- Aspect Ratio Bucketing.
- Supports Stable Diffusion v2.0.
learning procedure
step 1. Environment improvement
See the README in this repository.
step 2. Determine identifier and class
Decide the word identifier that connects the target you want to learn and the class to which the target belongs.
(There are various names such as instance, but for the time being I will stick to the original paper.)
Here's a very brief explanation (look it up for more details).
class is the general type to learn. For example, if you want to learn a specific breed of dog, the class will be dog. Anime characters will be boy, girl, 1boy or 1girl depending on the model.
The identifier is for identifying and learning the learning target. Any word is fine, but according to the original paper, ``a rare word with 3 letters or less that becomes one token with tokinizer'' is good.
By using the identifier and class to train the model, for example, "shs dog", you can learn by identifying the object you want to learn from the class.
When generating an image, if you say "shs dog", an image of the learned dog breed will be generated.
(For reference, the identifier I use these days is shs sts scs cpc coc cic msm usu ici lvl cic dii muk ori hru rik koo yos wny.)
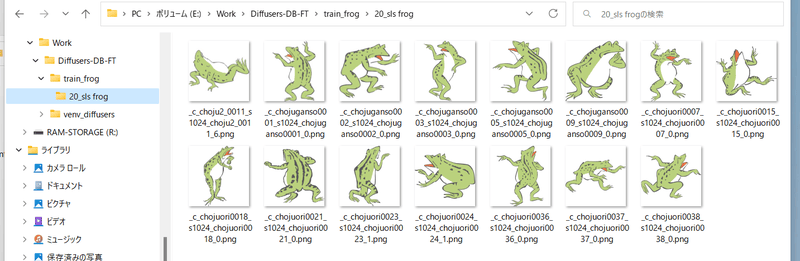
step 3. Prepare images for training
Create a folder to store training images. __In addition, create a directory with the following name:
<repeat count>_<identifier> <class>
Don't forget the _ between them.
The number of repetitions is specified to match the number of regularized images (described later).
For example, at the prompt "sls frog", to repeat the data 20 times, it would be "20_sls frog". It will be as follows.
step 4. Preparing regularized images
This is the procedure when using a regularized image. It is also possible to learn without using the regularization image (the whole target class is affected because it is impossible to distinguish without using the regularization image).
Create a folder to store the regularized images. __In addition, __ create a directory named <repeat count>_<class>.
For example, with the prompt "frog" and without repeating the data (just once):
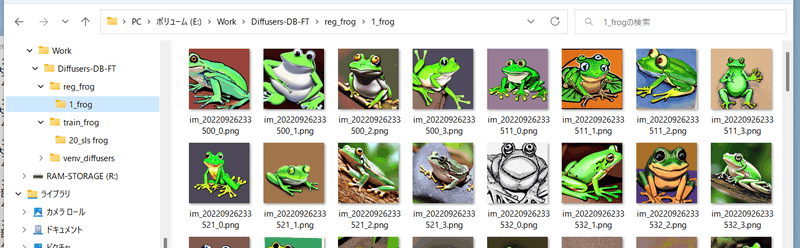
Specify the number of iterations so that " __ number of iterations of training images x number of training images ≥ number of iterations of regularization images x number of regularization images __".
(The number of data in one epoch is "number of repetitions of training images x number of training images". If the number of regularization images is more than that, the remaining regularization images will not be used.)
step 5. Run training
Run the script. The maximally memory-saving command looks like this (actually typed on one line):
*The command for learning additional networks such as LoRA is train_network.py instead of train_db.py. You will also need additional network_* options, so please refer to LoRA's guide.
accelerate launch --num_cpu_threads_per_process 8 train_db.py
     --pretrained_model_name_or_path=<directory of .ckpt or .safetensord or Diffusers model>
     --train_data_dir=<training data directory>
     --reg_data_dir=<regularized image directory>
     --output_dir=<output destination directory for trained model>
     --prior_loss_weight=1.0
     --resolution=512
     --train_batch_size=1
     --learning_rate=1e-6
     --max_train_steps=1600
     --use_8bit_adam
     --xformers
     --mixed_precision="bf16"
     --cache_latents
     --gradient_checkpointing
It seems to be good to specify the number of CPU cores for num_cpu_threads_per_process.
Specify the model to perform additional training in pretrained_model_name_or_path. You can specify a Stable Diffusion checkpoint file (.ckpt or .safetensors), a model directory on the Diffusers local disk, or a Diffusers model ID (such as "stabilityai/stable-diffusion-2"). The saved model after training will be saved in the same format as the original model by default (can be changed with the save_model_as option).
prior_loss_weight is the loss weight of the regularized image. Normally, specify 1.0.
resolution will be the size of the image (resolution, width and height). If bucketing (described later) is not used, use this size for training images and regularization images.
train_batch_size is the training batch size. Set max_train_steps to 1600. The learning rate learning_rate is 5e-6 in the diffusers version and 1e-6 in the StableDiffusion version, so 1e-6 is specified here.
Specify mixed_precision="bf16" (or "fp16") and gradient_checkpointing for memory saving.
Specify the xformers option and use xformers' CrossAttention. If you don't have xformers installed, if you get an error (without mixed_precision, it was an error in my environment), specify the mem_eff_attn option instead to use the memory-saving version of CrossAttention (speed will be slower) .
Cache VAE output with cache_latents option to save memory.
If you have a certain amount of memory, specify it as follows, for example.
accelerate launch --num_cpu_threads_per_process 8 train_db.py
     --pretrained_model_name_or_path=<directory of .ckpt or .safetensord or Diffusers model>
     --train_data_dir=<training data directory>
     --reg_data_dir=<regularized image directory>
     --output_dir=<output destination directory for trained model>
     --prior_loss_weight=1.0
     --resolution=512
     --train_batch_size=4
     --learning_rate=1e-6
     --max_train_steps=400
     --use_8bit_adam
     --xformers
     --mixed_precision="bf16"
     --cache_latents
Remove gradient_checkpointing to speed up (memory usage will increase). Increase the batch size to improve speed and accuracy.
An example of using bucketing (see below) and using augmentation (see below) looks like this:
accelerate launch --num_cpu_threads_per_process 8 train_db.py
     --pretrained_model_name_or_path=<directory of .ckpt or .safetensord or Diffusers model>
     --train_data_dir=<training data directory>
     --reg_data_dir=<regularized image directory>
     --output_dir=<output destination directory for trained model>
     --resolution=768,512
     --train_batch_size=20 --learning_rate=5e-6 --max_train_steps=800
     --use_8bit_adam --xformers --mixed_precision="bf16"
     --save_every_n_epochs=1 --save_state --save_precision="bf16"
     --logging_dir=logs
     --enable_bucket --min_bucket_reso=384 --max_bucket_reso=1280
     --color_aug --flip_aug --gradient_checkpointing --seed 42
About the number of steps
To save memory, the number of training steps per step is half that of train_drebooth.py (because the target image and the regularization image are divided into different batches instead of the same batch). Double the number of steps to get almost the same training as the original Diffusers version and XavierXiao's StableDiffusion version.
(Strictly speaking, the order of the data changes due to shuffle=True, but I don't think it has a big impact on learning.)
Generate an image with the trained model
Name last.ckpt in the specified folder when learning is completed will output the checkpoint (if you learned the DiffUsers version model, it will be the last folder).
For v1.4/1.5 and other derived models, this model can be inferred by Automatic1111's WebUI, etc. Place it in the models\Stable-diffusion folder.
When generating images with WebUI with the v2.x model, a separate .yaml file that describes the model specifications is required. Place v2-inference.yaml for v2.x base and v2-inference-v.yaml for 768/v in the same folder and make the part before the extension the same name as the model.

Each yaml file can be found at [https://github.com/Stability-AI/stablediffusion/tree/main/configs/stable-diffusion] (Stability AI SD2.0 repository).
Other study options
Supports Stable Diffusion 2.0 --v2 / --v_parameterization
Specify the v2 option when using Hugging Face's stable-diffusion-2-base, and specify both the v2 and v_parameterization options when using stable-diffusion-2 or 768-v-ema.ckpt.
In addition, learning SD 2.0 seems to be difficult with VRAM 12GB because the Text Encoder is getting bigger.
The following points have changed significantly in Stable Diffusion 2.0.
- Tokenizer to use
- Which Text Encoder to use and which output layer to use (2.0 uses the penultimate layer)
- Output dimensionality of Text Encoder (768->1024)
- Structure of U-Net (number of heads of CrossAttention, etc.)
- v-parameterization (the sampling method seems to have changed)
Among these, 1 to 4 are adopted for base, and 1 to 5 are adopted for the one without base (768-v). Enabling 1-4 is the v2 option, and enabling 5 is the v_parameterization option.
check training data --debug_dataset
By adding this option, you can check what kind of image data and captions will be learned in advance before learning. Press Esc to exit and return to the command line.
*Please note that it seems to hang when executed in an environment where there is no screen such as Colab.
Stop training Text Encoder --stop_text_encoder_training
If you specify a numerical value for the stop_text_encoder_training option, after that number of steps, only the U-Net will be trained without training the Text Encoder. In some cases, the accuracy may be improved.
(Probably only the Text Encoder may overfit first, and I guess that it can be prevented, but the detailed impact is unknown.)
Load and learn VAE separately --vae
If you specify either a Stable Diffusion checkpoint, a VAE checkpoint file, a Diffuses model, or a VAE (both of which can specify a local or Hugging Face model ID) in the vae option, that VAE is used for learning (latents when caching or getting latents during learning). The saved model will incorporate this VAE.
save during learning --save_every_n_epochs / --save_state / --resume
Specifying a number for the save_every_n_epochs option saves the model during training every epoch.
If you specify the save_state option at the same time, the learning state including the state of the optimizer etc. will be saved together (compared to restarting learning from the checkpoint, you can expect to improve accuracy and shorten the learning time). The learning state is output in a folder named "epoch-??????-state" (?????? is the number of epochs) in the destination folder. Please use it when studying for a long time.
Use the resume option to resume training from a saved training state. Please specify the learning state folder.
Please note that due to the specifications of Accelerator (?), the number of epochs and global step are not saved, and it will start from 1 even when you resume.
No tokenizer padding --no_token_padding
The no_token_padding option does not pad the output of the Tokenizer (same behavior as Diffusers version of old DreamBooth).
Training with arbitrary size images --resolution
You can study outside the square. Please specify "width, height" like "448,640" in resolution. Width and height must be divisible by 64. Match the size of the training image and the regularization image.
Personally, I often generate vertically long images, so I sometimes learn with "448, 640".
Aspect Ratio Bucketing --enable_bucket / --min_bucket_reso / --max_bucket_reso
It is enabled by specifying the enable_bucket option. Stable Diffusion is trained at 512x512, but also at resolutions such as 256x768 and 384x640.
If you specify this option, you do not need to unify the training images and regularization images to a specific resolution. Choose from several resolutions (aspect ratios) and learn at that resolution. Since the resolution is 64 pixels, the aspect ratio may not be exactly the same as the original image.
You can specify the minimum size of the resolution with the min_bucket_reso option and the maximum size with the max_bucket_reso. The defaults are 256 and 1024 respectively. For example, specifying a minimum size of 384 will not use resolutions such as 256x1024 or 320x768. If you increase the resolution to 768x768, you may want to specify 1280 as the maximum size.
When Aspect Ratio Bucketing is enabled, it may be better to prepare regularization images with various resolutions that are similar to the training images.
(Because the images in one batch are not biased toward training images and regularization images.
augmentation --color_aug / --flip_aug
Augmentation is a method of improving model performance by dynamically changing data during learning. Learn while subtly changing the hue with color_aug and flipping left and right with flip_aug.
Since the data changes dynamically, it cannot be specified together with the cache_latents option.
Specify data precision when saving --save_precision
Specifying float, fp16, or bf16 as the save_precision option will save the checkpoint in that format (only when saving in Stable Diffusion format). Please use it when you want to reduce the size of checkpoint.
save in any format --save_model_as
Specify the save format of the model. Specify one of ckpt, safetensors, diffusers, diffusers_safetensors.
When reading Stable Diffusion format (ckpt or safetensors) and saving in Diffusers format, missing information is supplemented by dropping v1.5 or v2.1 information from Hugging Face.
Save learning log --logging_dir / --log_prefix
Specify the log save destination folder in the logging_dir option. Logs in TensorBoard format are saved.
For example, if you specify --logging_dir=logs, a logs folder will be created in your working folder, and logs will be saved in the date/time folder. Also, if you specify the --log_prefix option, the specified string will be added before the date and time. Use "--logging_dir=logs --log_prefix=db_style1_" for identification.
To check the log with TensorBoard, open another command prompt and enter the following in the working folder (I think tensorboard is installed when Diffusers is installed, but if it is not installed, pip install Please put it in tensorboard).
tensorboard --logdir=logs
Then open your browser and go to http://localhost:6006/ to see it.
scheduler related specification of learning rate --lr_scheduler / --lr_warmup_steps
You can choose the learning rate scheduler from linear, cosine, cosine_with_restarts, polynomial, constant, constant_with_warmup with the lr_scheduler option. Default is constant. With lr_warmup_steps, you can specify the number of steps to warm up the scheduler (gradually changing the learning rate). Please do your own research for details.
Training with fp16 gradient (experimental feature) --full_fp16
The full_fp16 option will change the gradient from normal float32 to float16 (fp16) and learn (it seems to be full fp16 learning instead of mixed precision). As a result, it seems that the SD1.x 512x512 size can be learned with a VRAM usage of less than 8GB, and the SD2.x 512x512 size can be learned with a VRAM usage of less than 12GB.
Specify fp16 in the accelerate config beforehand and optionally set mixed_precision="fp16" (bf16 does not work).
To minimize memory usage, use xformers, use_8bit_adam, cache_latents, gradient_checkpointing options and set train_batch_size to 1.
(If you can afford it, increasing the train_batch_size step by step should improve the accuracy a little.)
It is realized by patching the PyTorch source (confirmed with PyTorch 1.12.1 and 1.13.0). Accuracy will drop considerably, and the probability of learning failure on the way will also increase. The setting of the learning rate and the number of steps seems to be severe. Please be aware of them and use them at your own risk.
Other learning methods
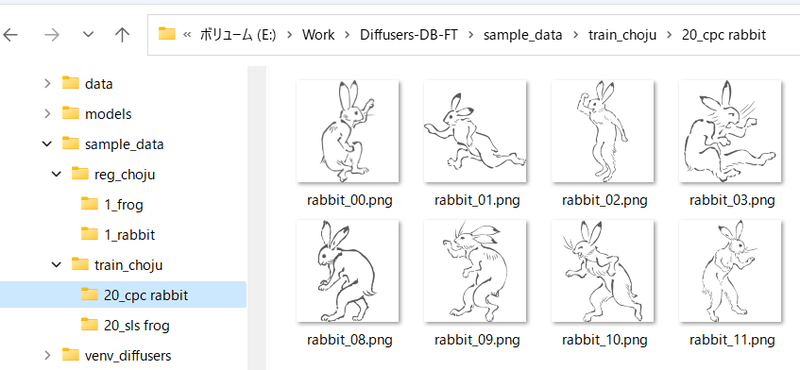
Learning multiple classes, multiple identifiers
The method is simple, multiple folders with Repetition count_<identifier> <class> in the training image folder, and a folder with Repetition count_<class> in the regularization image folder. Please prepare multiple
For example, learning "sls frog" and "cpc rabbit" at the same time would look like this:
If you have one class and multiple targets, you can have only one regularized image folder. For example, if 1girl has character A and character B, do as follows.
- train_girls
- 10_sls 1girl
- 10_cpc 1girl
- reg_girls -1_1girl
If the number of data varies, it seems that good results can be obtained by adjusting the number of repetitions to unify the number of sheets for each class and identifier.
Use captions in DreamBooth
If you put a file with the same file name as the image and the extension .caption (you can change it in the option) in the training image and regularization image folders, the caption will be read from that file and learned as a prompt.
- The folder name (identifier class) will no longer be used for training those images.
Adding captions to each image (you can use BLIP, etc.) may help clarify the attributes you want to learn.
Caption files have a .caption extension by default. You can change it with --caption_extension. With the --shuffle_caption option, study captions during learning while shuffling each part separated by commas.